How to Transcribe Interviews Fast and Accurately in 2026

Transcription can eat 6 hours for every hour of audio. The fix starts with one decision most people skip: choosing the right style before the first file is uploaded.
Every hour of recorded interview audio carries a hidden cost. Before a single insight reaches a report, a quote lands in an article, or a client receives a summary, someone has to turn that audio into readable text. That someone is usually the same person who conducted the interview, scheduled the call, and has three other deadlines waiting. Tools like Cockatoo's voice transcription app exist precisely because that person cannot afford to lose a full working day to a task that happens before the real work even starts. See our voice transcription app for how this works in practice.
"Manual transcription is time-consuming enough that people actively seek tools to automate it, meaning it 'steals' significant time from their day." — what we hear from transcription tool users
According to the Tinrec Blog, manual transcription takes approximately 4 to 6 hours of typing for every 1 hour of audio recorded. For a solo operations coordinator processing three discovery calls a week, transcription alone can consume most of the working week before analysis, formatting, or delivery begins. The cost is time and the compounding effect on everything downstream.
4 to 6 hours of typing per hour of audio recorded
The common assumption is that free auto-captions are "good enough" with a quick cleanup pass. In practice, free tools collapse on accented speech, crosstalk, and field recordings, producing output that requires nearly as much correction time as transcribing from scratch.
Fixing someone else's errors is slower than building from silence, because every line demands a judgment call: is this wrong, or just awkward? The mental model most people carry, that transcription is a binary choice between slow-but-accurate manual typing and fast-but-messy auto-captions, breaks down the moment the recording has two speakers, a non-native accent, or any background noise. Before any tool can rescue those hours, there is a decision that shapes everything downstream: choosing the right transcription style for your specific interview. Get that wrong and even the best AI output will need hours of reformatting before it is usable.
Key takeaways
- Manual transcription of a one-hour interview typically consumes most of a working day, the bottleneck is no longer skill or patience, it's a fixable workflow problem.
- Choosing the wrong transcription style (clean verbatim vs. intelligent verbatim vs. full verbatim) before you start is the most consequential decision in the process, and most teams make it by accident.
- A properly configured AI workflow, upload, set speaker count, export, returns a one-hour transcript in roughly three minutes, not three hours.
- At 97-98% first-pass accuracy, reviewing an AI transcript is a quality gate, not a correction job: expect 60-120 word-level errors across a full hour, not hundreds.
- Five structural elements (header metadata, speaker labels, timestamps, notation conventions, and consistent formatting) determine whether a transcript is a usable tool or a cleanup project.
- Subscription billing structure is the transcription decision most buyers ignore, and the one that determines whether a tool stays affordable at volume.
- Cockatoo closes the loop: upload any audio or video file, set the speaker count so renaming one speaker updates every line, and get a punctuated, capitalised, editable transcript back, with word-level timestamps and published accuracy tests across 30 languages to back the claims.
What Are the Three Main Transcription Styles and When Should Each Be Used
Picking the wrong transcription style before you start is not a formatting problem. What most teams report is that it is the first and most consequential decision in the transcription workflow, because a mismatch forces a complete redo, and a redo on a 60-minute interview can cost more time than the original pass did. The choice sits upstream of every tool, every keyboard shortcut, every export setting. Get it right in the first 30 seconds of setup and the rest of the workflow runs clean.
One of the most consistent struggles beginners face is not knowing which style their project actually demands. A podcast editor reaches for full verbatim out of caution, a qualitative researcher settles for a summary because it looked cleaner, and a YouTube creator picks the wrong mode entirely because the tool never explained the difference. That mismatch is corrected by understanding the purpose behind each style before the first file is uploaded.
The three styles divide by purpose. A common pattern is that people treat them as points on a formality scale, tidying up whichever output the tool gives them. In practice, each style answers a different analytical question, and choosing the wrong one does not just create extra editing work. It can make the transcript analytically unusable.
1. Full Verbatim - Every Filler, Stutter, and Non-Verbal Cue Captured

Full verbatim records every utterance exactly as spoken: filler words, false starts, repetitions, stutters, and non-verbal cues such as laughter or pauses. Across the market, this style is required when the manner of speaking is itself the data, as in discourse analysis, conversation analysis, or legal proceedings. The real trade-off is editing time. A full verbatim pass on audio that only needed clean verbatim doubles downstream cleanup without adding any analytical value, so reserve it for projects where how something was said carries as much weight as what was said.
When the source material is not in English, the stakes of style selection rise further. Choosing the wrong style in a multilingual interview creates the same costly redo problem in any language.
2. Clean Verbatim - Meaningful Content Kept, Distracting Fillers Removed
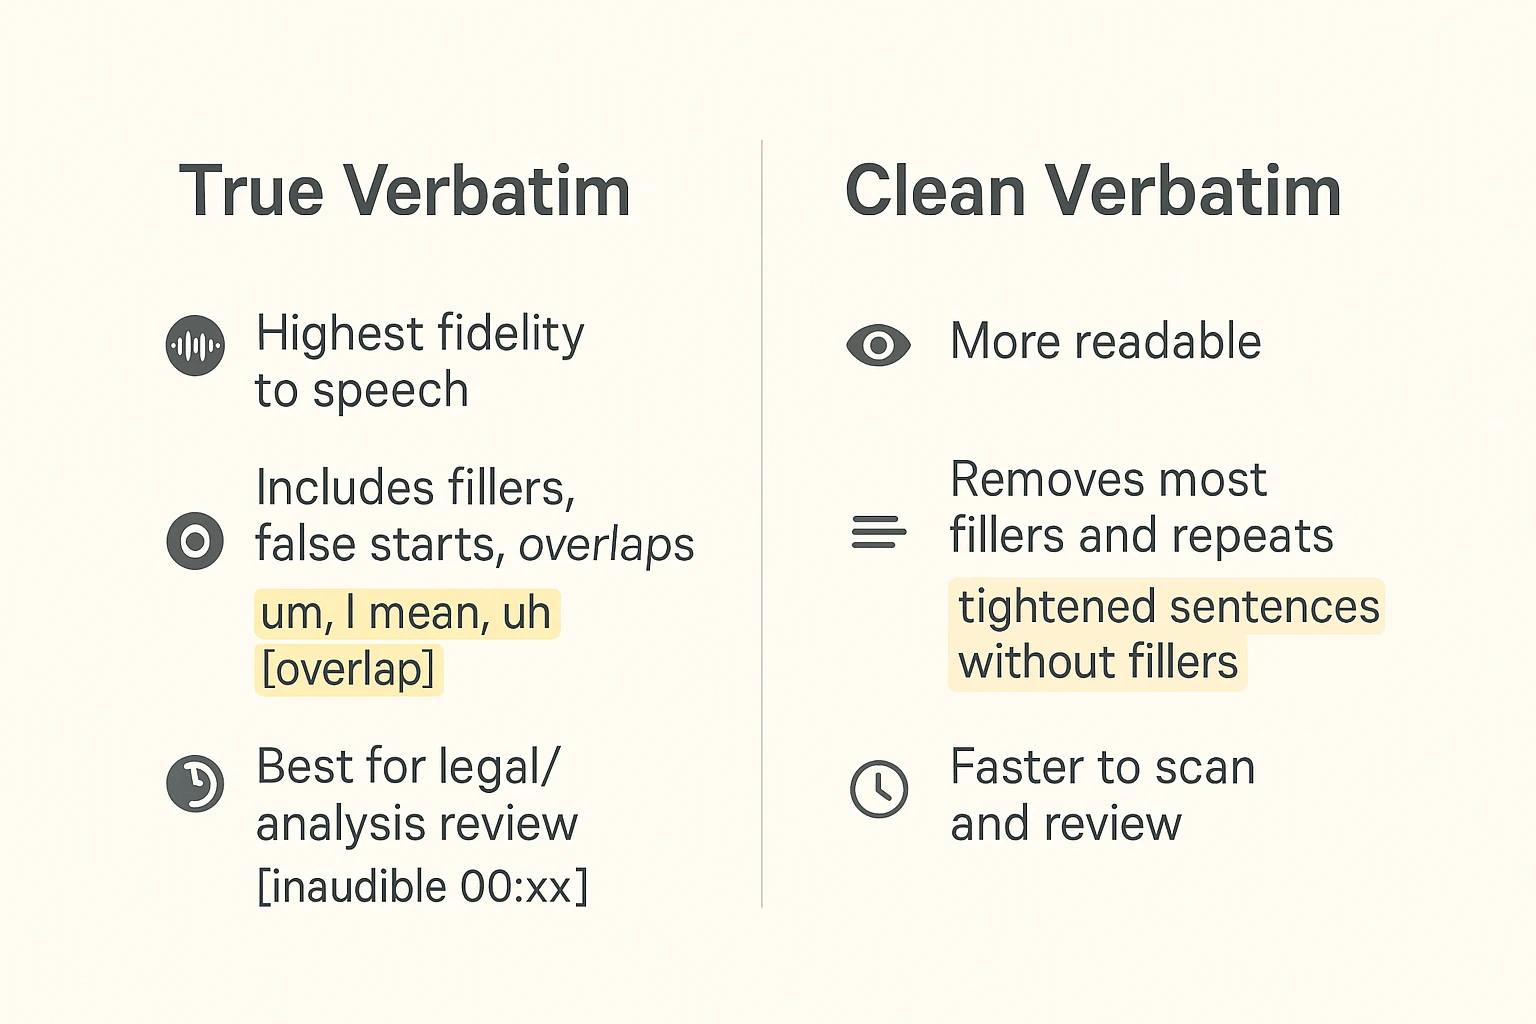
Clean verbatim (also called intelligent verbatim) removes filler words, false starts, and stumbles while keeping every substantive word intact. Broader industry trends identify it as the preferred style for thematic analysis, journalism, business reports, and general research archives where readability matters more than capturing every vocal nuance. This is the right default for most prosumer use cases: a marketing manager pulling quotes for a case study, a researcher coding themes in a qualitative dataset, or a solo operator turning a client call into shareable documentation.
Cockatoo's transcription engine applies punctuation and capitalisation automatically, so a clean verbatim output arrives structured and readable without a manual formatting pass. For users on the free tier, no credit card required, up to three files per day, that automatic clean output removes one more setup decision from the workflow on day one. Pro users get truly unlimited transcription on the default modes with no monthly hour cap, and the highest-accuracy mode is available when a project demands the most precise clean verbatim rendering possible, with a weekly usage limit shown in Settings and unlimited modes always available as a fallback.
When the finished transcript needs to travel, to a client, a publisher, or a colleague, Cockatoo exports in PDF, DOCX, TXT, and SRT formats, with bulk export supported on Pro. That means the clean verbatim transcript moves out of the tool in whatever format the downstream workflow requires, without a conversion step.
3. Summarized Transcription - Core Insights Only, Tangents Cut
Summarized transcription captures only core insights and essential sentences, cutting irrelevant tangents entirely. By any measure, it is the fastest style to produce but sacrifices nuance and is unsuitable for any analysis requiring the participant's exact words. It works well for internal briefings or quick reference notes where the reader needs the conclusion, not the conversation. The hard limitation: if a stakeholder later asks for a direct quote or a researcher needs to verify a coded theme against the original, a summarized transcript cannot provide it. A project that starts with summarized output and later needs verbatim coverage requires a full redo from the source audio.
Cockatoo's Canvas, the AI notes editor included on every plan including the free tier, is a practical home for summarized output. Rather than committing the entire transcript to a summary style and losing the original, you can run a full or clean verbatim transcription, retain that file in your Cockatoo storage, and use Canvas to extract and organise the core insights separately. That way the summary serves the briefing without destroying the analytical record.
Once you know which style your project demands, the next question is whether your tools and setup can actually deliver it without adding friction back into the process. That is where most time-saving gains, or losses, are really decided.
What Tools and Setup Are Needed for Manual vs AI-Assisted Transcription
For manual transcription, the right setup is a media player with global hotkeys configured for pause, rewind, and fast-forward, plus a pair of flat-response headphones that reproduce speech frequencies without boosting bass or treble. The hotkeys matter more than most people expect: lifting your hands from the keyboard to click a mouse control adds friction on every pause, and those seconds compound across a four-to-six-hour session. oTranscribe and Express Scribe are the two tools researchers and journalists reach for most, both because they support keyboard shortcuts natively and because they run in a browser or desktop environment without requiring a separate audio editor.
1. Manual Transcription Rig - Media Player with Global Hotkeys and Flat-Response Headphones
The right manual rig is oTranscribe or Express Scribe with global hotkeys mapped to pause, rewind five seconds, and speed control, paired with closed-back headphones that reproduce speech clearly. This setup is the right call when your institution requires a human-verified record, or when audio quality is too poor for any automated tool. The real tradeoff: even a well-configured rig still costs you four to six hours of active typing for every one hour of recorded audio.
2. AI-Assisted Upload-and-Get-Text Workflow - Speaker Labels, Timestamps, and Auto-Punctuation Included
Upload a file, set a speaker count, and receive a transcript with speaker labels, word-level timestamps, and punctuation applied automatically. This workflow collapses hours of typing into minutes of review. Free auto-caption tools fail on accented speech and crosstalk in ways that require near-scratch re-transcription, while a purpose-built AI transcription tool at high accuracy needs only surgical edits to proper nouns and acronyms. Treating these two tiers as equivalent leads people to dismiss AI transcription as untrustworthy.
One underused capability worth flagging: Cockatoo supports link import, so if your interview or recording already lives at a URL, a YouTube video, a podcast episode, or a shared cloud file, you can paste the link directly rather than downloading and re-uploading the file. That removes a step that quietly wastes time across a large project. Upload any audio or video file and get an editable transcript back, with the following included:
- Speaker recognition with a settable speaker count; renaming a speaker updates every line.
- Word-level timestamps, with paragraph, sentence, and speaker-turn export options; punctuation and capitalisation applied automatically.
- Clean-verbatim style by default; no noise reduction is applied to uploads.
Published accuracy tests cover 30 languages run on the same public test set researchers use to compare transcription engines, including real-world recordings with background noise and accents, with per-language coverage available on the benchmarks page so you can verify accuracy for your specific language before committing a batch. When a recording also needs published captions or subtitles, Cockatoo's video captioning and subtitle export handles that in the same workflow, and if any supporting documents need to be read or sent in another language, PDF and document translation covers PDF, DOCX, PPTX, XLSX, and TXT formats.
Beyond transcription, the AI summarisation layer matters most on long recordings: rather than reading through two hours of transcript to find the three decisions that need acting on, you can surface only what actually requires a response, a practical time compression that compounds across a research project with dozens of interviews.
3. Otter.ai vs Cockatoo - Meeting-Bot Orientation vs File-Upload Simplicity
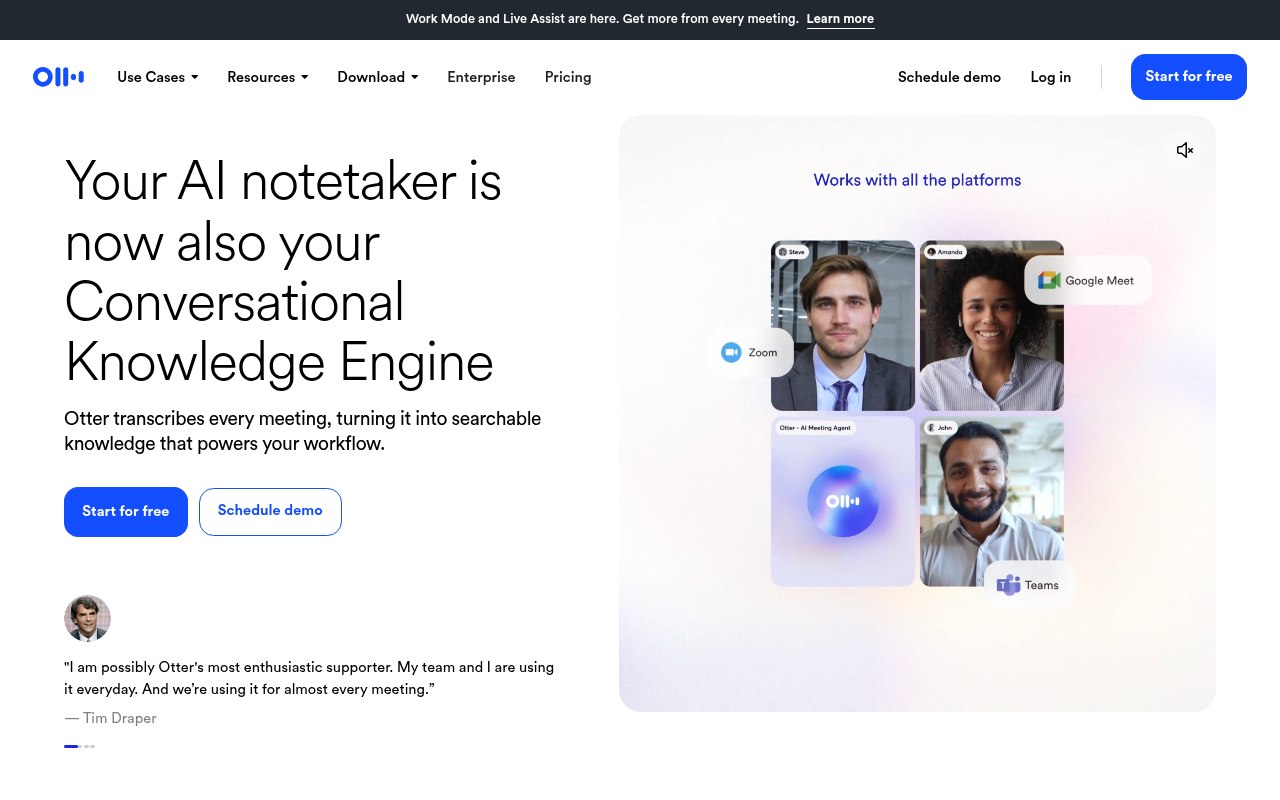
Otter.ai is purpose-built for a genuinely valuable use case: joining live Zoom, Teams, or Google Meet calls and generating a real-time transcript without any post-meeting upload step. If your primary need is meeting transcription while the conversation is still happening, that live-bot architecture is a real advantage. The mismatch surfaces when researchers try to use a live-meeting-oriented tool on pre-recorded field interview files that already exist as audio or video files: the bot-invite and calendar-permission workflow adds steps that simply do not apply.
A tool built around file upload, and link import for recordings that already have a URL, returns a speaker-labelled transcript on the first upload with no calendar access and no bot to configure, a structural fit for the pre-recorded interview workflow. File-upload-first workflows consistently reduce time-to-first-transcript for pre-recorded interviews, precisely because the architecture matches the task.
4. Unlimited Plan Fine Print - 720-Hour Monthly Caps vs Cockatoo's Structurally Unlimited Default
One pain that hits researchers and operations staff hard: processing 50 or more large interview files is slow when a tool forces one-by-one uploads, and it becomes critical when a hidden monthly hour cap stops the queue mid-project with a deadline approaching. Cockatoo's Pro plan addresses both problems directly. On the upload side, Pro supports batches of up to 20 files at a time, which meaningfully reduces the per-file overhead when working through a large archive.
The highest-accuracy modes do carry a weekly usage limit shown in Settings, so check that before committing a large batch; the standard unlimited modes remain available when that limit is reached. Pro also includes Canvas, Cockatoo's AI notes editor, and exports to PDF, DOCX, TXT, and SRT with bulk export supported, so the finished transcript moves directly into your analysis software without reformatting. Storage is 2 TB per account.
99 USD/mo billed annually during the current Summer Sale. 97 USD/mo billed annually, with 2 TB of encrypted cloud storage per person. If you are not ready to commit, the Free tier lets you test the full workflow, no credit card required, with three transcripts per day, up to 30 minutes each, 2 GB of encrypted cloud storage, and all export types available.
5. Core Tools for Transcribing Interviews - Matching the Right Software to Your Method and Volume

The tool choice sets a hard ceiling on your workflow before you type a single word. For manual work: oTranscribe (browser-based, free) or Express Scribe (desktop, hotkey-rich) with a media player that supports variable playback speed. For AI-assisted work: a file-upload-first tool with link import for URL-based recordings, speaker recognition, published accuracy benchmarks across multiple languages, and export to the formats your analysis software accepts. If you transcribe more than a few files a week, the plan structure matters as much as the accuracy score, specifically whether batch uploads are supported and whether the "unlimited" label holds up without hidden monthly ceilings.
Choosing the right tool is the decision that makes everything downstream faster. The next section walks through the exact three-step AI workflow, from upload to clean, editable text, so you can see precisely where the time savings land and what a five-minute review actually looks like in practice.
How to Transcribe Interviews Step by Step Using an AI Tool
Three minutes. That is roughly how long it takes to get a transcript back from a one-hour interview file when the workflow is set up correctly, a processing speed that reflects the real-time-multiple advantage modern AI transcription models carry over manual typing. According to the Tinrec Blog (2026), AI transcription tools can save up to 90% of the time previously spent transcribing recordings and interviews. The catch is that most people still treat the tool as a faster typist, then spend an hour cleaning up the same categories of error that a smarter pre-upload routine would have prevented entirely.
90% of transcription time saved with AI tools
One of the sharpest pain points in this workflow is the in-person meeting or interview with four to six participants. When you are both running the conversation and trying to capture it by hand, the note-taking suffers. You cannot actively participate and simultaneously produce accurate, attributed notes across half a dozen voices. Most AI transcription tools compound this problem because they are built primarily for virtual meetings on Zoom or Teams, leaving anyone who records in a conference room, a field interview, or a focus group without a purpose-fit solution. Cockatoo is designed to handle audio and video files regardless of how they were captured, so the same workflow below applies whether your recording came from a laptop, a handheld recorder, or a phone sitting on a desk.
The three steps that matter most happen before and immediately after the AI runs, not during a slow line-by-line read-through afterward.
Step 1 - Trim Silence and Assess Your Recording Before You Upload
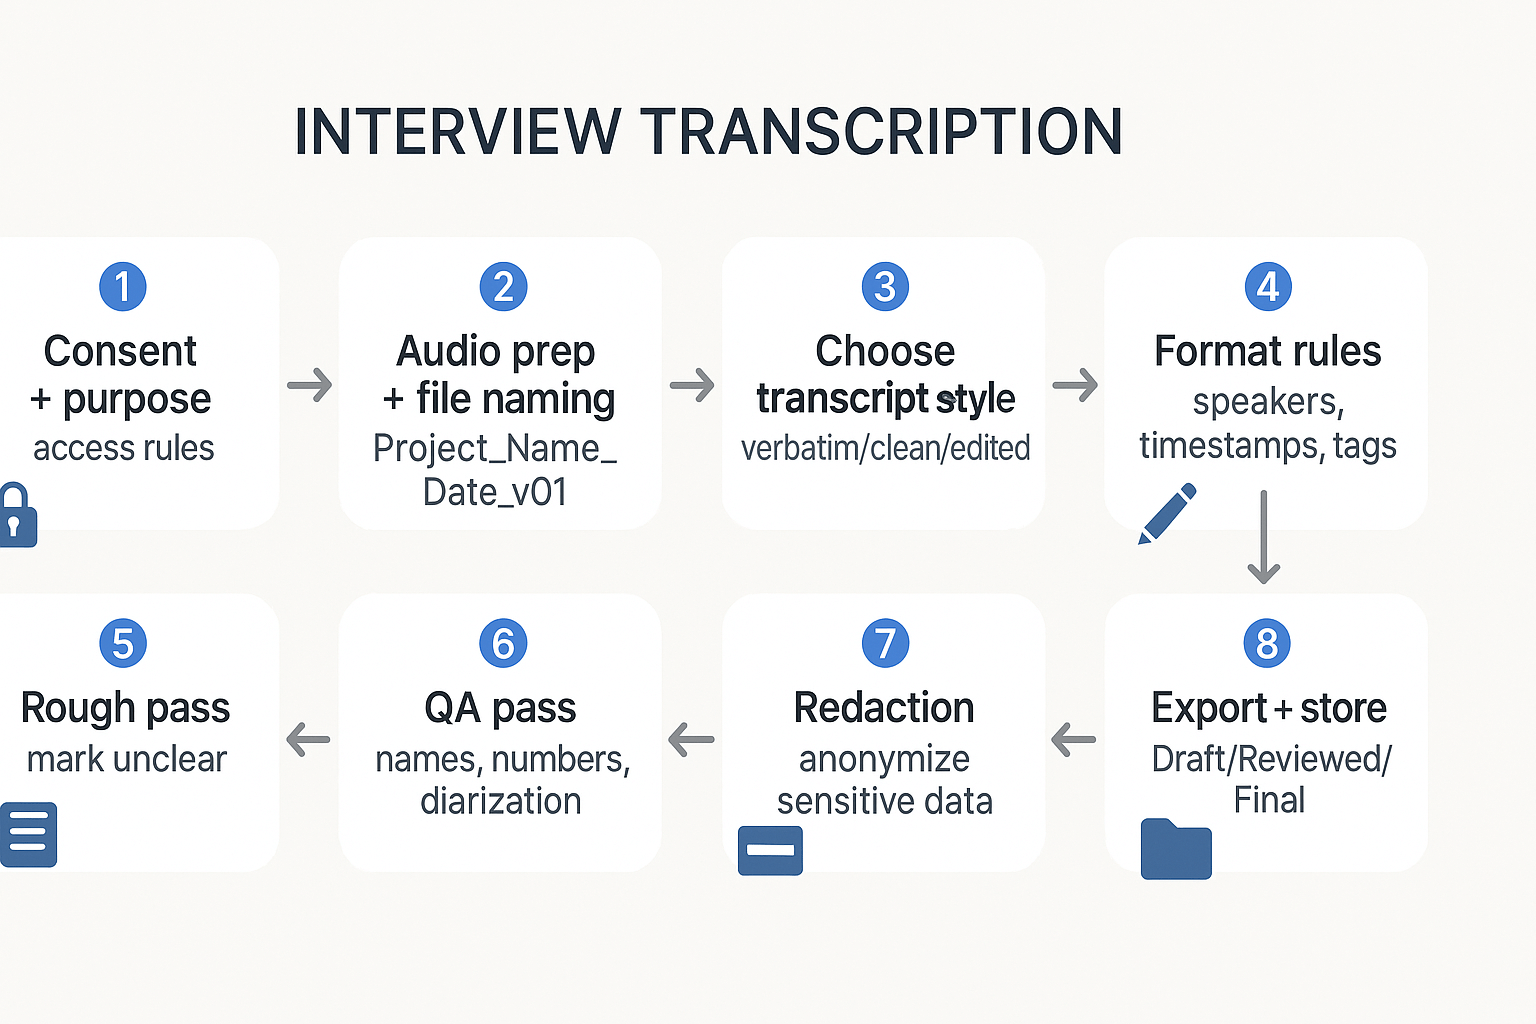
Before touching any AI tool, strip dead air from the start and end of your file and note how many distinct speakers appear. This prep step directly improves diarization accuracy because the model isn't wasting compute on silence. Also decide upfront whether you need clean verbatim or full verbatim output, that choice shapes every editing decision downstream. The tradeoff: prep adds 5-10 minutes but saves far more in review time.
Step 2 - Upload Your File and Set the Correct Speaker Count
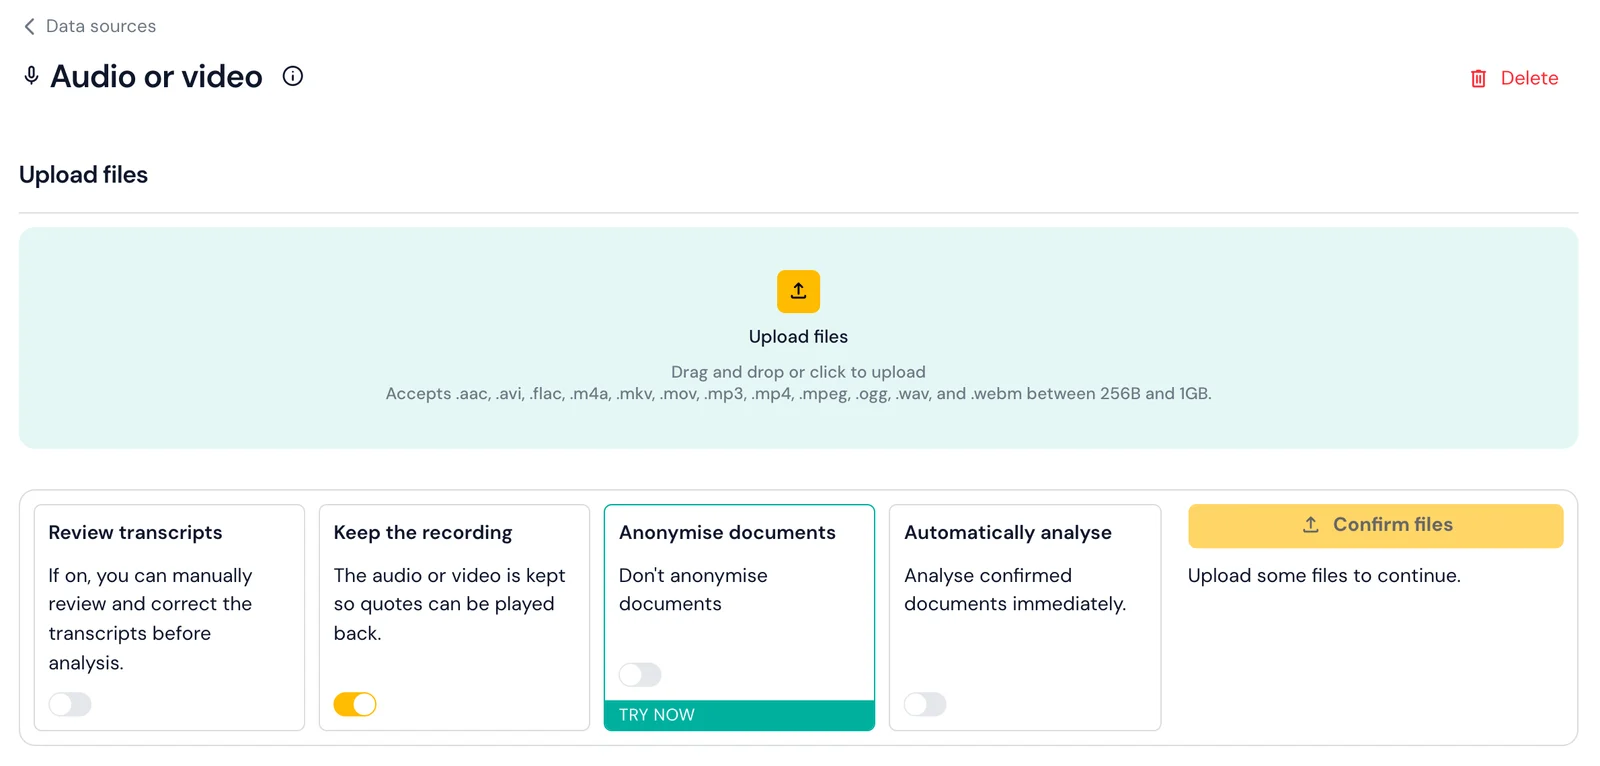
Once your file is ready, upload it to your chosen AI transcription tool and configure the speaker count to match what you noted in Step 1. Giving the model the right target number is the single biggest lever for clean speaker diarization. Most tools then return a first-pass transcript within minutes. The limitation: if your recording has overlapping speech or poor mic separation, even a correctly configured tool will produce labeling errors that require manual correction.
Step 3 - Rename Speaker Labels So Every Line Updates Automatically
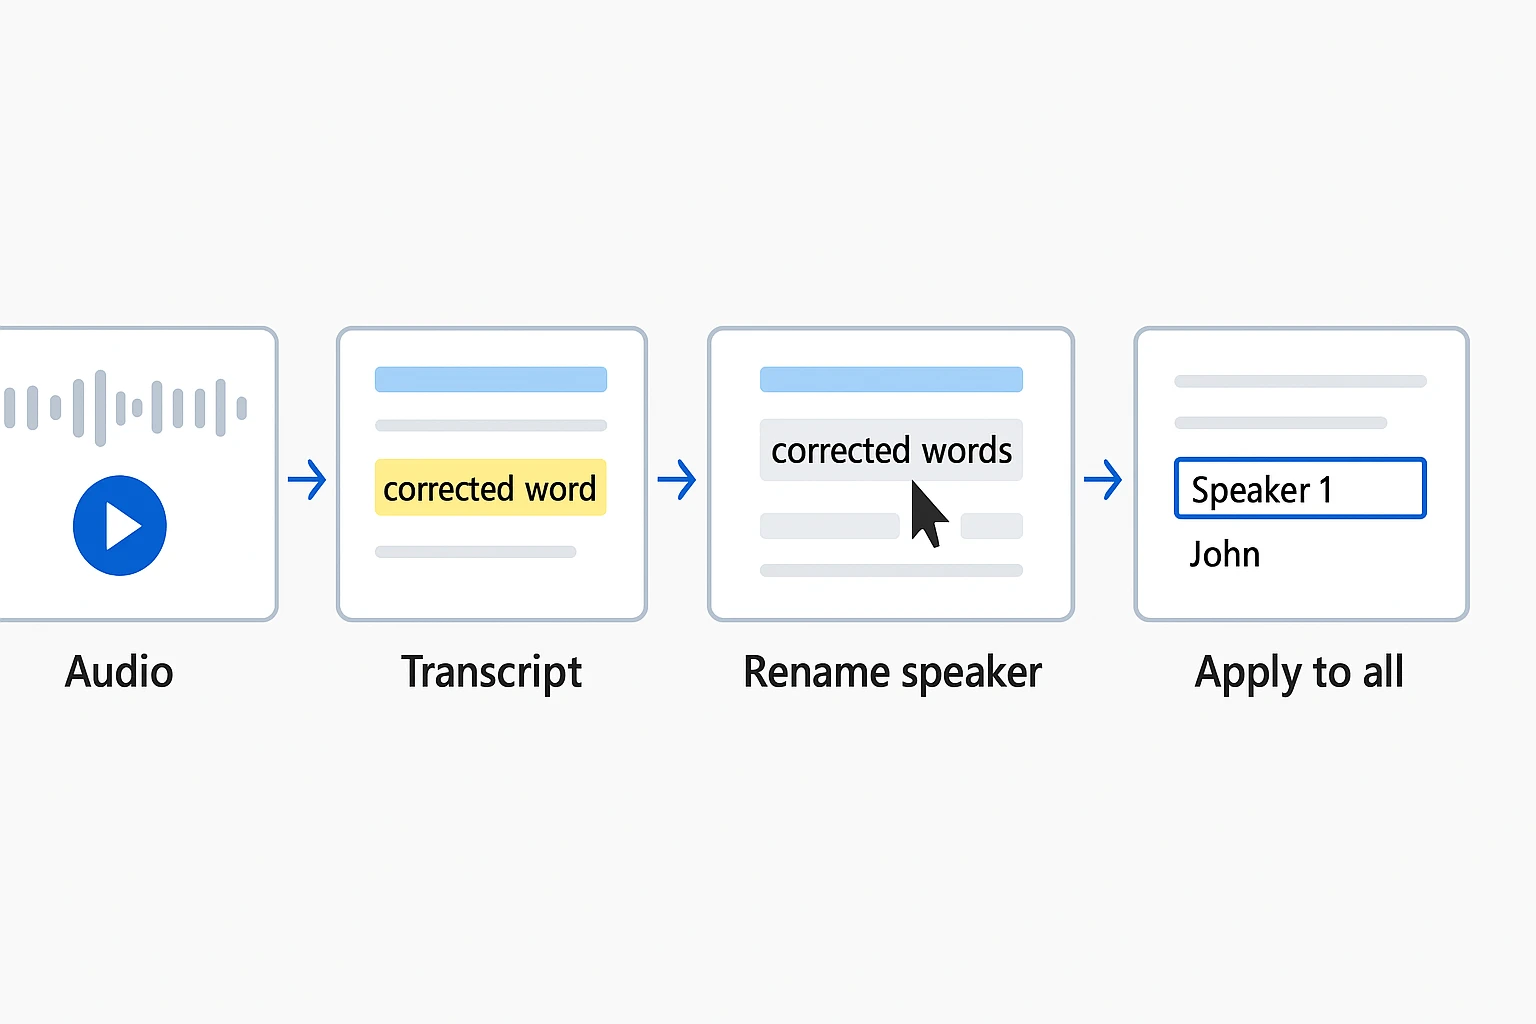
Most AI transcription platforms let you rename a speaker label once, say, changing 'Speaker 1' to 'Dr. Patel', and propagate that change across every instance in the document instantly. Do this before any line-level editing to avoid repetitive manual work. Then scan specifically for proper nouns, acronyms, and domain-specific terms the model likely misheard. The tradeoff: bulk rename is powerful but can mask a misidentified speaker block if diarization errors weren't caught first.
Step 4 - Audit Proper Nouns, Acronyms, and Technical Terms the AI Missed
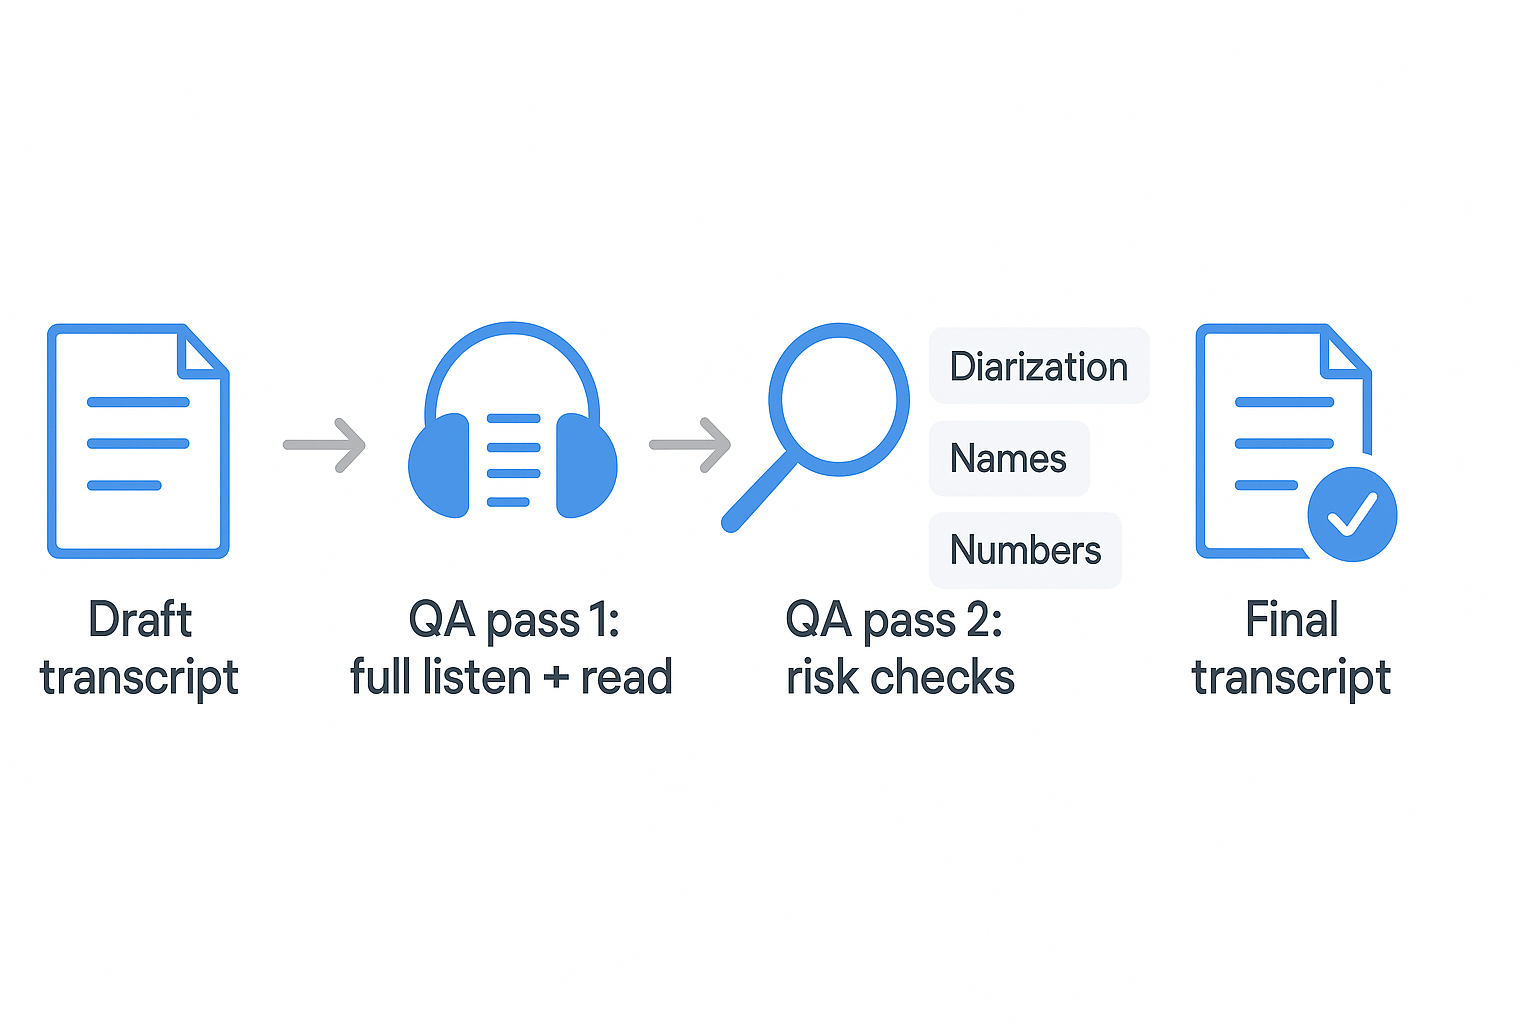
AI models excel at common vocabulary but routinely stumble on industry jargon, brand names, and initialisms. After renaming speakers, run a targeted pass, not a full read-through, searching for phonetic approximations of known terms in your subject matter. Many tools let you add a custom vocabulary or glossary before processing; if yours does, use it. The limitation: custom glossaries help but don't eliminate errors when terms sound like common words in context.
Step 5 - Choose Clean Verbatim vs. Full Verbatim Before Finalizing
Clean verbatim removes filler words, false starts, and repetitions to produce a readable document; full verbatim captures every 'um,' stutter, and interruption for legal, linguistic, or qualitative research use. Confirm which style your end use requires before you finalize edits, because retrofitting the wrong style wastes significant time. Most AI tools default to clean verbatim. The tradeoff: full verbatim is more accurate to the source but dramatically harder to read and quote from.
Step 6 - Export in the Format Your Workflow Actually Needs
After editing, export the transcript in the format your downstream workflow requires, DOCX for editorial teams, SRT for video captioning, or plain TXT for data pipelines. Choosing the wrong format at this stage forces reformatting that erases timestamp alignment. Check whether your tool embeds timestamps and speaker labels in the export, not just in the editor view. The limitation: some platforms lock certain export formats behind paid tiers, so verify this before committing to a tool.
Step 7 - Run a Final Accuracy Check Against the Original Audio
The last step is a spot-check, not a full re-listen: jump to five or six random timestamps, play 20-30 seconds each, and confirm the text matches. This catches systematic errors, a misheard recurring phrase, a consistently wrong speaker assignment, that line-by-line editing misses. It also gives you a defensible quality benchmark if the transcript will be published or submitted formally. The tradeoff: skipping this step is tempting when the AI output looks clean, but surface fluency often hides repeated substitution errors.
Related Reading
- How To Transcribe Youtube Video
- Best Transcription Software For Qualitative Research
- Meeting Transcription And Summary Ai Tools
- Best Lecture Transcription App
- Best Transcription App For Iphone
- Best Closed Captioning Software
- Qualitative Research Transcription
- Business Transcription
- Automatic Video Transcription Software
- Market Research Transcription
- Podcast Transcription Software
- Best Medical Transcription Software
- Zoom Ai Transcription
- Best Transcription Software For Interviews
What Standard Formatting Elements Make a Professional Interview Transcript
A professional interview transcript has five structural elements. Get all five right and the document becomes a tool that speeds up every task that follows. Miss even one and you pay for it later, usually during analysis, when fixing structure costs far more time than building it correctly from the start.
1. Header Metadata Block - Interview Date, Participants, Project Title, and File Name

The header is the transcript's identity card. A complete header includes the interview date, each participant's name and role, the project title, and the original file name. This matters beyond academic research: in legal contexts, courts have excluded or challenged deposition transcripts where basic document metadata was absent or inconsistent, because traceability goes to credibility. Set it once, at the top, and every reader who opens the file knows exactly what they are holding.
2. Bold Speaker Labels with Colons - Applied Consistently from First Page to Last
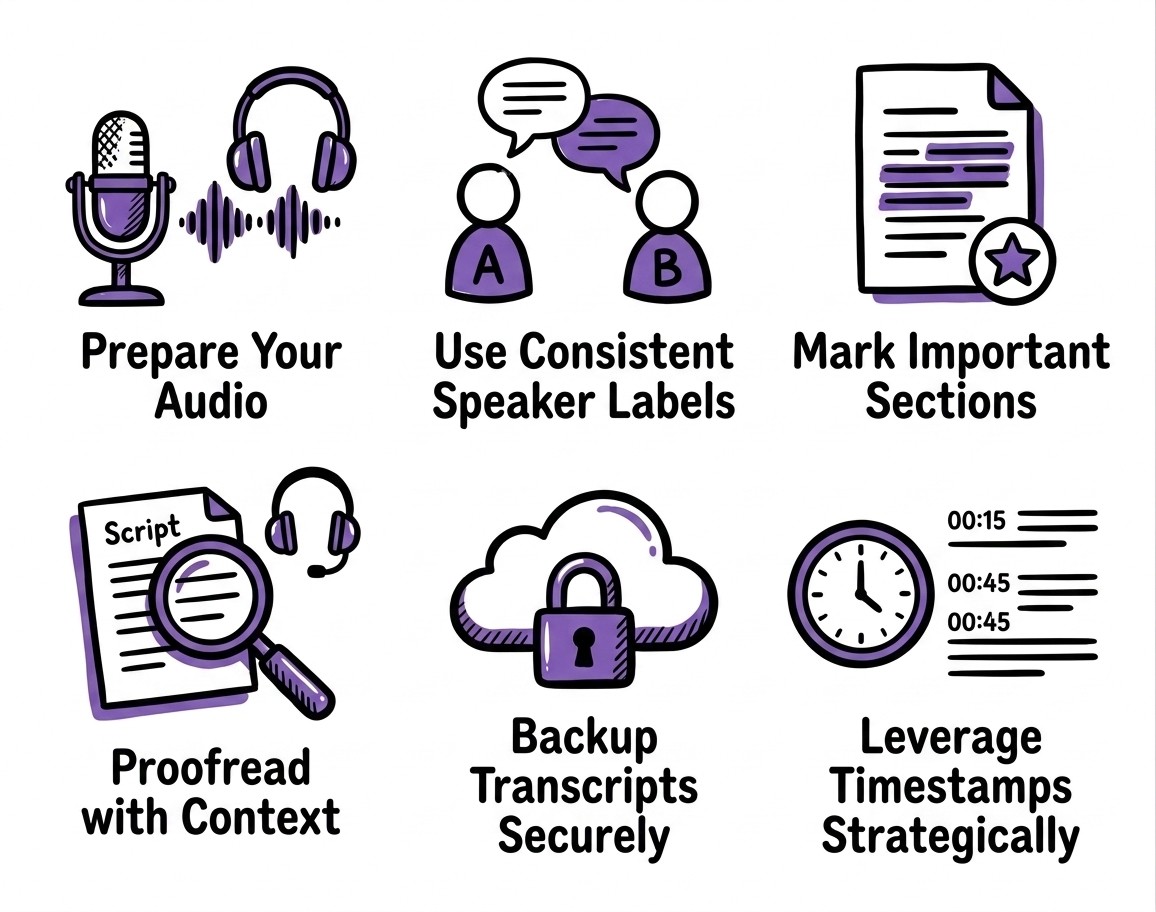
Speaker labels are the single formatting element that most transcripts get wrong. A label like "INTERVIEWER:" or "P1:" must appear at the start of every turn, bolded, in the same format from page one to the last line. Inconsistent labeling, where "Int." becomes "I" becomes "Interviewer" across the same document, forces a reader to decode the transcript rather than read it. That friction compounds badly when the document goes to a colleague or a legal reviewer who was not in the room.
3. Regular Timestamps at Every Speaker Turn for Precise Audio Navigation
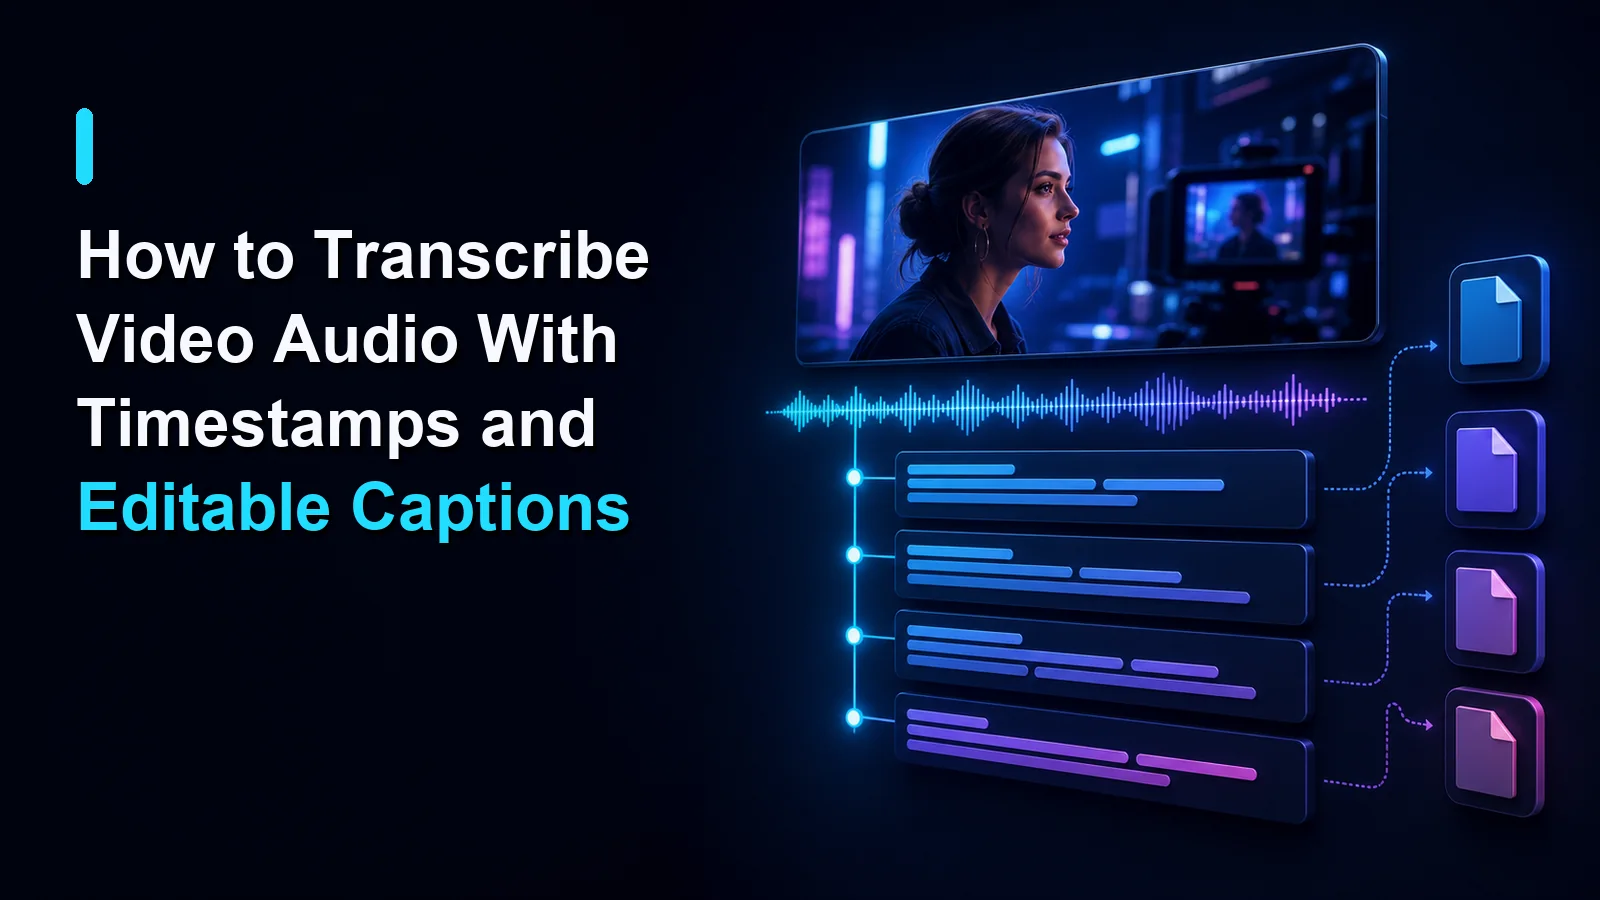
A timestamp at each speaker turn, formatted as [00:14:32], lets a reader jump directly to a moment in the source recording without scrubbing through audio. Industry practice among qualitative researchers treats this as standard rather than optional, and the reason is practical: a timestamp converts the transcript from a standalone document into a navigable index of the recording. Without it, verifying a quote means replaying the whole file.
4. Coding-Ready Structure with Speaker Turns as Natural Unit Boundaries for Qualitative Research
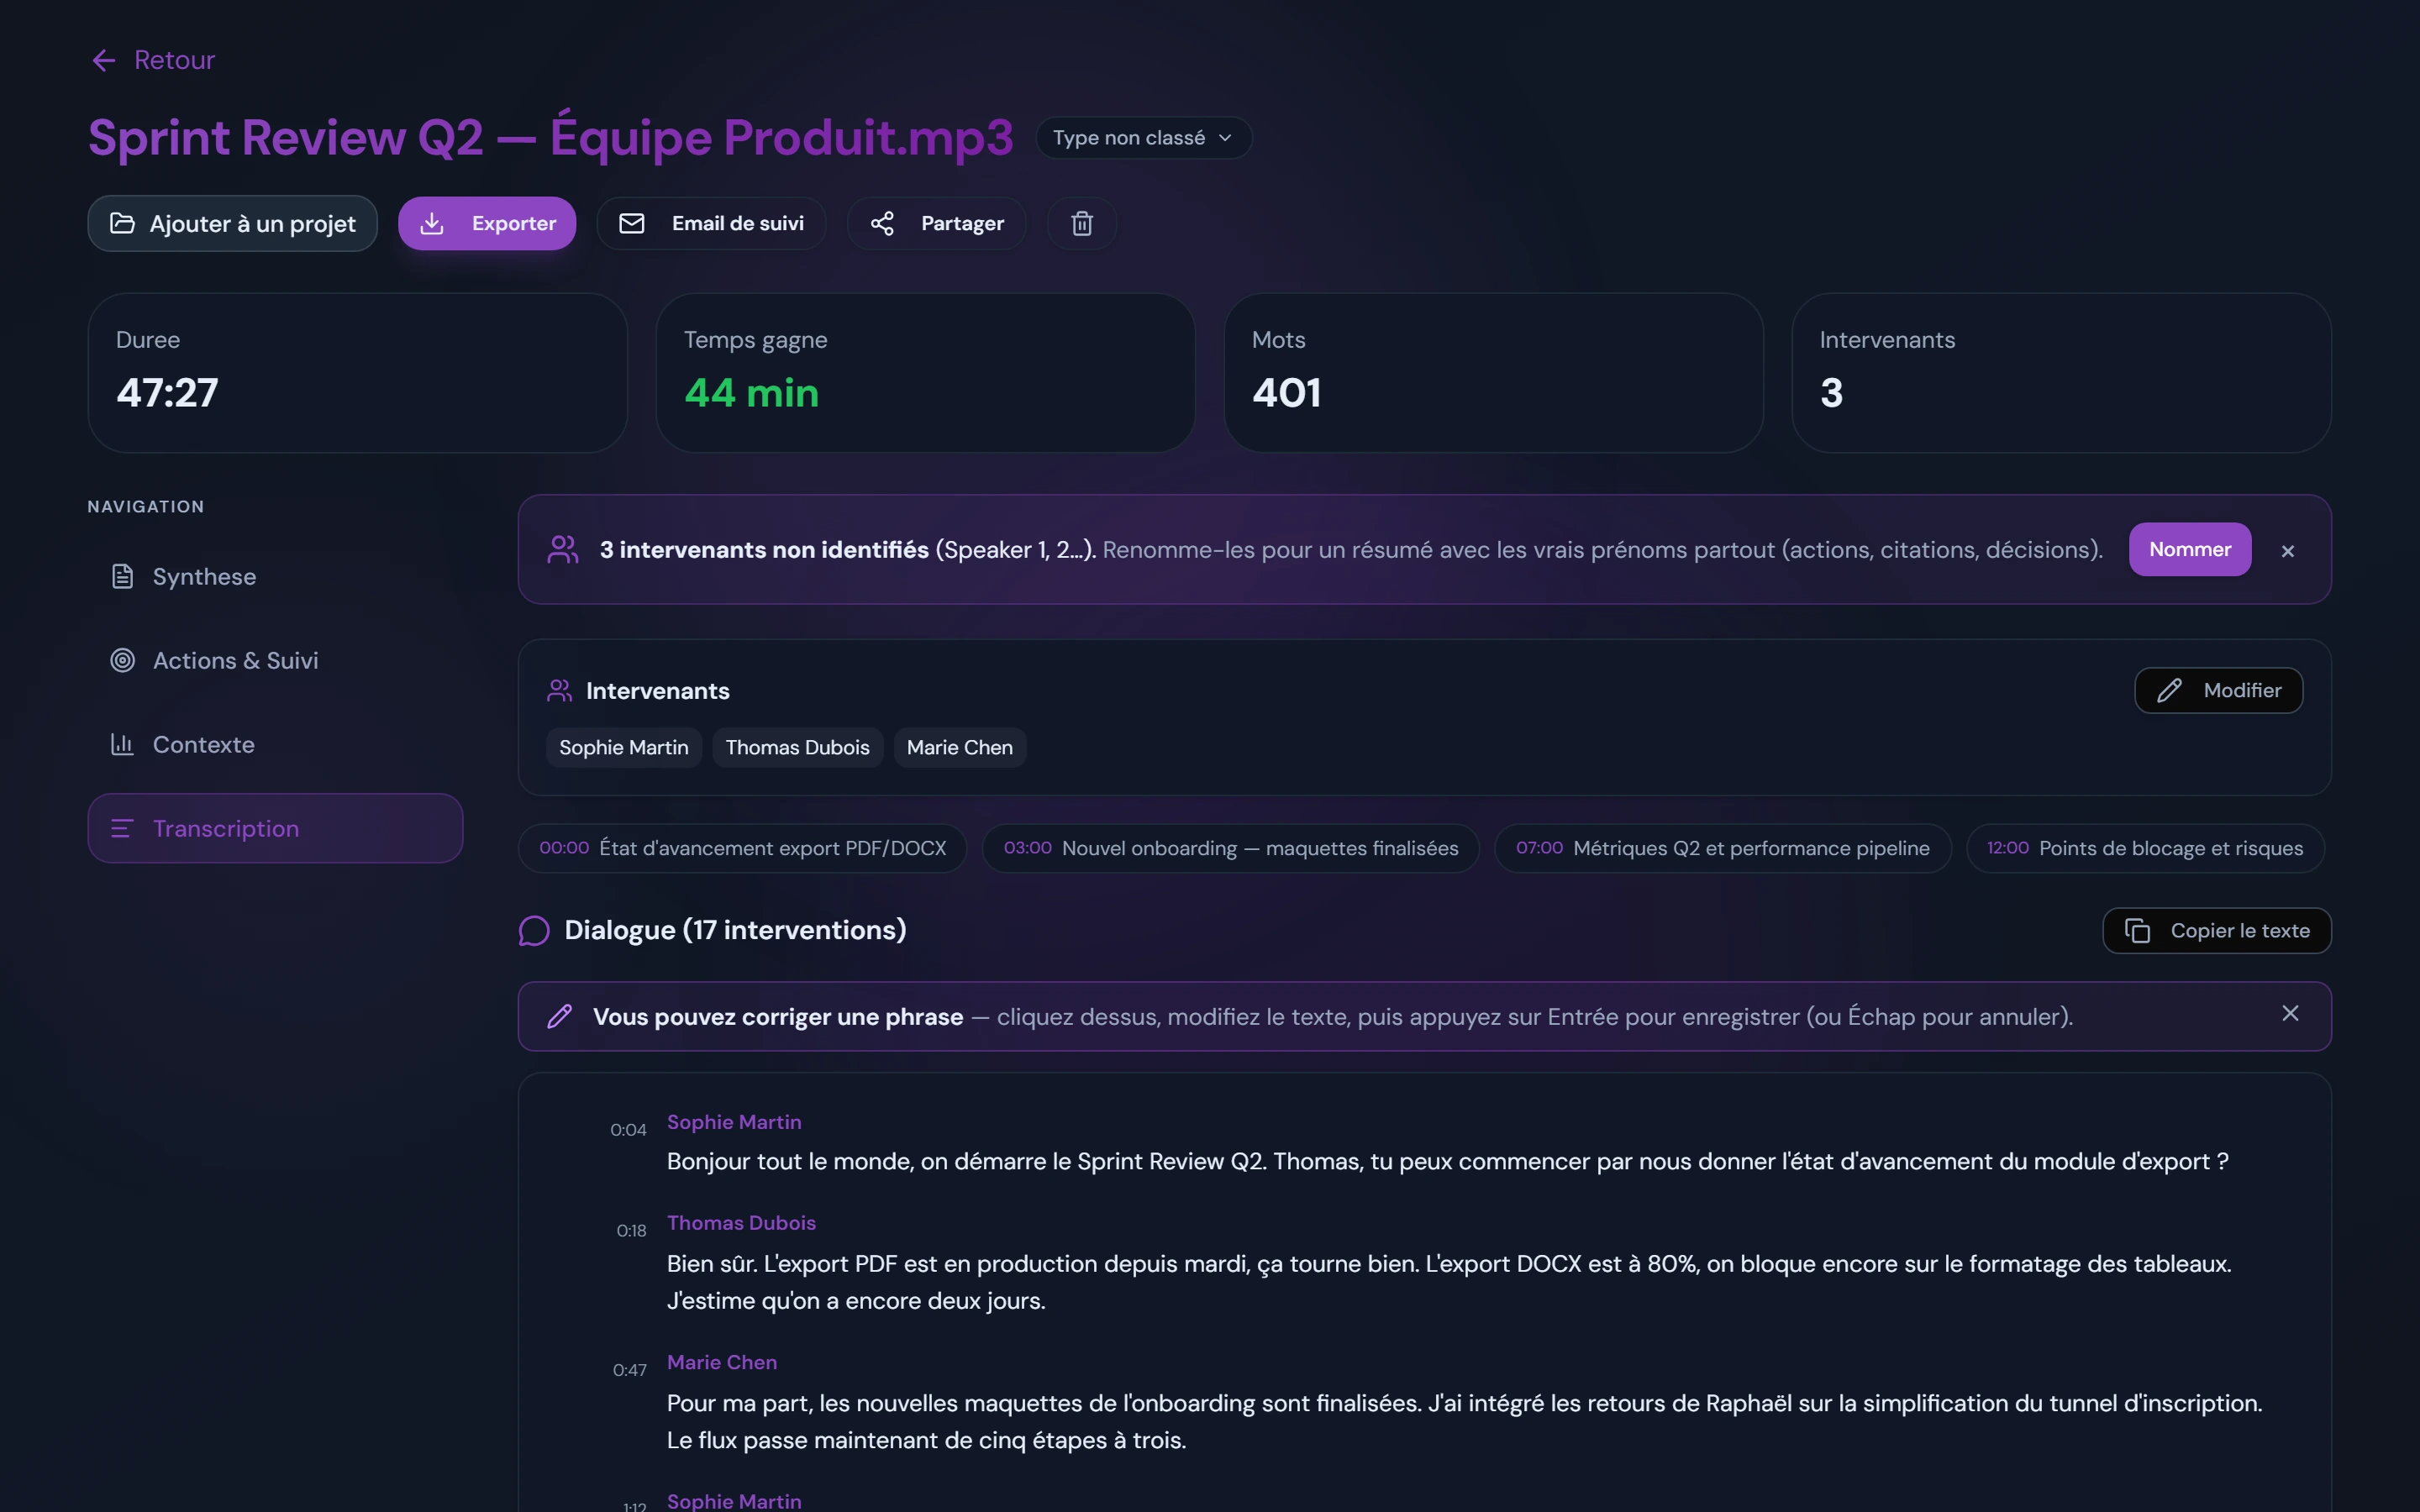
Qualitative researchers using tools like NVivo or ATLAS.ti import transcripts and code by segment. Both platforms treat the speaker turn as the natural unit boundary, so a transcript where each turn is a discrete, labeled block imports cleanly and codes without manual restructuring. A wall of continuous text, or a transcript where two speakers share a paragraph, breaks that workflow immediately. A voice transcription app that outputs word-level timestamps and speaker labels at every turn delivers a file that goes straight from export into a coding environment, with no reformatting step between.
5. Verbatim vs. Clean Verbatim Style Declaration - Set Once in the Header and Honored Throughout
The style declaration tells every reader how to interpret the text. Full verbatim captures every filler, repetition, and false start. Clean verbatim removes them while keeping all meaningful content. Neither is wrong; choosing the wrong one for the purpose is. Declare the style in the header ("Transcription style: clean verbatim") and apply it without exception throughout the document. A transcript that switches styles mid-interview, verbatim in the first half and edited in the second, creates a reliability problem that is almost impossible to detect without re-listening to the audio.
These five elements give your transcript its professional skeleton. But even the cleanest structure cannot tell a reader what to do when a speaker trails off, two voices overlap, or a name needs to be redacted. Notation conventions take over at that point, and they are worth getting right before you share a single line with anyone else.
What Notation Conventions Should Be Used for Inaudible Audio, Interruptions, Non-Verbal Cues, and Confidential Information
Four notation conventions are all a professional transcript needs to be self-contained. Skip even one, and every analyst, lawyer, or editor who reads the file will eventually stop and reach for the original recording, which erases the time the transcript was supposed to save.
1. [inaudible] - Inline Placeholder for Undecipherable Audio
Place [inaudible] at the exact word position where audio drops out, not at the end of the sentence. Positional accuracy matters: a reader scanning for a specific claim needs to know whether three words or thirty words are missing. Industry practice treats more than four or five [inaudible] markers per hour of audio as a signal that the recording quality is the problem, not the transcription. When reviewing your transcript, look for a tool whose editor highlights or visually distinguishes low-confidence segments immediately after processing; this lets you place [inaudible] at the precise word position rather than hunting through the audio to locate gaps.
2. Em-Dash - Notation for Interrupted or Cut-Off Speech

An em-dash placed immediately after the last audible syllable, with no preceding space, signals that a speaker was interrupted or self-interrupted mid-utterance. This is the standard convention when learning how to transcribe interviews for academic or journalistic purposes. It preserves the natural dynamics of conversation for discourse analysts. The tradeoff is potential confusion with em-dashes used for parenthetical asides, so consistency across the full transcript is essential.
3. [laughs], [pause], [crosstalk] - Bracketed Tags for Meaning-Relevant Non-Verbal Cues
The rule here is meaning-relevant only. A sigh that changes the emotional register of an answer belongs in the transcript; a chair scrape does not. Use square brackets and a plain descriptor: [laughs], [long pause], [crosstalk]. Crosstalk is especially important in multi-speaker recordings where two voices overlap, because it tells the analyst why the next speaker turn may be incomplete rather than leaving an unexplained gap.
4. [hidden] or [redacted] - Bracketed Markers for Confidential or Sensitive Information
[hidden] and [redacted] serve different purposes. Use [hidden] for information a participant asked to keep off the record during the interview. Use [redacted] for information removed after the fact to meet data-protection obligations, such as names, contact details, or health information that falls under GDPR or HIPAA requirements. Standardising the marker from the first transcript, rather than inventing a shorthand mid-project, means every downstream reader understands exactly what was removed and why.
With these four conventions locked in, your transcript is structurally complete. Every gap, interruption, non-verbal cue, and sensitive disclosure is accounted for without a single return trip to the audio file. What remains is the brief quality pass that separates a first-draft AI output from a document you would hand to a client or submit to a journal, and that review process is faster than most people expect.
The Review and Editing Process That Keeps Transcript Accuracy from Slipping
It is a quality gate. AI transcription tools deliver up to 97.7% accuracy, which means a one-hour recording carries roughly 60-120 word-level errors across the entire file, not hundreds. With Cockatoo, that transcript comes back on the first upload, no setup, no credit card required on the free tier, so the review pass starts the moment the file lands.
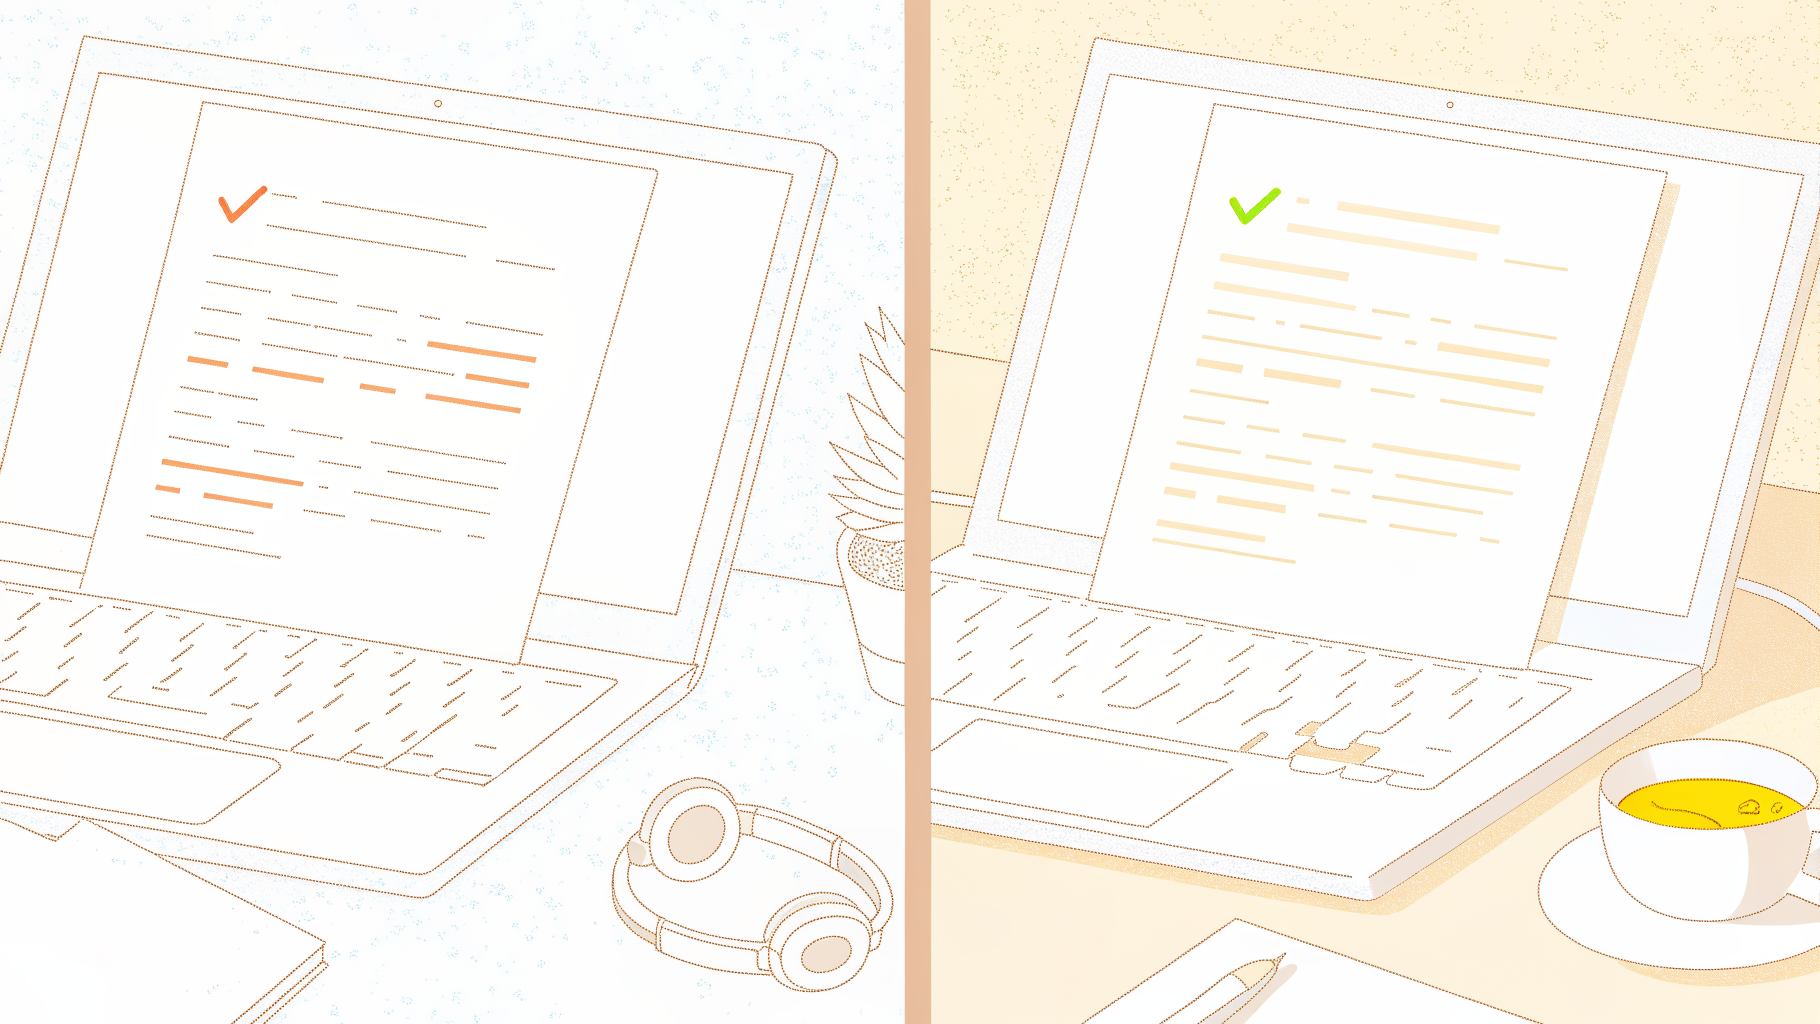
Speed Through the Audio Once at 1.5x Then Stop
Play the transcript review at 1.5x speed while following along in the text.
Where AI Transcription Still Stumbles on Technical Terms, Acronyms, and Proper Nouns
Proper nouns, acronyms, and technical terms are where AI transcription concentrates its remaining errors, and this is the correction burden beginners feel most sharply.
What a Clean Reviewed Transcript Actually Unlocks Downstream
Because Cockatoo exports to PDF and DOCX, the finished transcript goes straight into a Word file or a PDF that someone else can open, annotate, and edit, with no copy-pasting out of a web interface and no reformatting step. Industry research puts this plainly: a clean AI-generated transcript enables faster analysis, accurate quoting, and shareable documentation, collapsing what was once a multi-hour manual process into a light editing pass.
Why the Subscription Choice Is the Transcription Decision Most Guides Ignore
Subscription structure determines whether a voice transcription app stays affordable at volume, yet most buyers spend their research time comparing accuracy and export formats while ignoring the billing model entirely. That oversight becomes expensive once volume climbs.

The $120-Per-Hour Benchmark vs. AI Transcription Tools
Human transcription services cost approximately $120 per hour of audio at standard professional rates, which makes every self-serve AI tool look like an obvious win at first glance. But the benchmark conceals a more important calculation: when you transcribe manually yourself, a one-hour recording consumes four to six hours of your working day. At even a modest knowledge-worker hourly rate, that invisible labour cost far exceeds most AI subscription prices.
The billing model itself introduces a second layer of hidden cost worth examining before committing to any platform. Some plans that advertise unlimited transcription carry usage ceilings enforced quietly in account settings. A researcher who batch-processes recordings discovers the cap only when a workflow stalls mid-project. That is the real AI transcription cost trap: the unexpected ceiling that converts a flat-rate tool into an hourly meter at the worst possible moment.
Why Solo Operators Get Priced Out by Enterprise Tiers Before They Ever Hit Buy
For a solo operations coordinator or freelance researcher, the most practical plan is one that works for a single person with no approval chain and no seat minimum to meet. Cockatoo's Pro plan is a single-seat, self-serve purchase: sign up, upload, and get a transcript. The recording exists, the deadline is real, and the only thing standing between the two should be an upload.
Monthly vs. Annual: the Billing Decision That Changes the Economics of High-Volume Transcription
For someone processing a steady flow of recordings, billing cadence is a concrete dollars decision. Across the SaaS industry, annual plans typically carry a meaningful discount compared with paying month-to-month, so a researcher running a steady volume of interviews can recover the upfront commitment within a few billing cycles. The honest trade-off: annual billing is wrong if your volume is genuinely seasonal, in which case a monthly commitment preserves the flexibility to scale down without penalty.
Cockatoo's Pro plan applies no monthly hour cap and is a single-seat, self-serve purchase with no team-tier minimum standing between the recording and the transcript. Once the pricing decision is settled, the only thing left is the upload.
Next steps
If your interview recording is still sitting unprocessed because transcription feels like a full day's work, the path forward starts with recognizing that the category has genuinely moved. A purpose-built AI tool at 97-98% accuracy leaves roughly 60-120 word-level corrections on a one-hour file, not the wall of errors that makes free auto-captions a time sink. That is a targeted scan, not a retype. Start with our voice transcription app.
Setting the correct speaker count before upload is the highest-leverage action in the entire workflow, because diarisation errors compound into broken quotes that cost far more to fix than to prevent. And the real cost of skipping AI entirely is not zero: when manual transcription consumes four to six hours of a knowledge worker's time per recorded hour, the choice between AI and self-transcription is a known cost against an invisible one, and the invisible one almost always loses. Together, those two realities point to one practical conclusion: upload the file, declare the speaker count, and let the review pass be surgical rather than exhaustive.
Start with Cockatoo on the free tier, no credit card required, and run the full three-step workflow on a real file today.
Frequently Asked Questions
Should I use verbatim or clean verbatim transcription for my research interviews?
It depends on what you're analyzing. Full verbatim, capturing every filler, stutter, and non-verbal cue, is only necessary when how something was said is itself the data, such as in discourse analysis or legal proceedings. For thematic analysis, journalism, or business research where readability matters more than capturing every vocal nuance, clean verbatim is the right default for most projects.
How do I make sure my transcription style actually matches my analysis method?
Choose your style before uploading or typing a single word, because a mismatch forces a complete redo that can cost more time than the original transcription pass. Each style answers a different analytical question: full verbatim for analysis of speech patterns, clean verbatim for thematic coding and quote extraction, and summarized only for internal briefings where exact wording is never needed. If there's any chance a stakeholder will later ask for a direct quote or you'll need to verify a coded theme, don't start with summarized output.
How much time does transcribing a one-hour interview actually take if I do it manually?
Manual transcription takes approximately 4 to 6 hours of typing for every 1 hour of recorded audio. For someone processing three discovery calls a week, that means transcription alone can consume most of a working week before any analysis, formatting, or delivery begins.
Why do free auto-caption tools produce such messy transcripts that still need heavy editing?
Free auto-caption tools collapse on accented speech, crosstalk, and field recordings, producing output that requires nearly as much correction time as transcribing from scratch. Fixing someone else's errors is slower than starting fresh because every line demands a judgment call about whether the text is wrong or just awkward.
Can I keep a full transcript and still get a summary for sharing with stakeholders?
Yes, the post recommends running a full or clean verbatim transcription first and retaining that file, then using a tool like Cockatoo's Canvas AI notes editor to extract and organise core insights separately. That way the summary serves the briefing without destroying the analytical record you'd need if someone later asks for a direct quote or coded theme verification.